Like most people, you’re probably not a huge fan of the new ad-riddled Solitaire games that Microsoft included with Windows 10. Fortunately, a team of folks agreed with us and created something called “The Windows 7 Games for Windows 10” – which is exactly what it sounds like. Replicas of the games Hearts, Minesweeper, FreeCell, Solitaire, Mahjong, Internet Checkers and all your favorites, all for free.

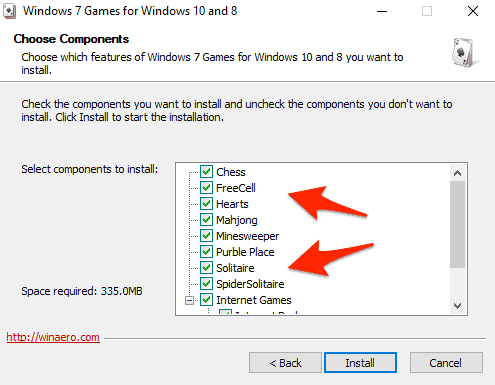
Head over to the game download page here. Download the .zip file, extract it and run the setup file. During the installation you’ll be provided with the option to choose which games you want to install. Simply remove the check mark from the box next to each game you don’t want to play.
Once the installation has completed you’ll find a new Games section in your Start Menu, with all of the newly installed Microsoft games.

That’s it – kiss your productivity goodbye! :) Update: Thanks to helpful reader Davin for his comment (see below). These games may be removed when you update Windows, so keep the installer file handy or bookmark the download page.

Online Games
In addition to the classic Windows game download, there are plenty of options to play these games online, either against a computer or in multiplayer mode. Here are a few of the top mobile-friendly websites for playing classic games like hearts, minesweeper, and Freecell for free.

