This walkthrough will take you through every step of installing Microsoft Windows Vista on your Intel Mac (running 10.5 or later), using Boot Camp. It will cover a number of possible errors that you may encounter, and how to get around them. Each time I bring up an error I will explain in detail what you’ll need to do to resolve the issue and continue installing Vista. It’s up to you to decide if it’s worth the time and effort (for example, you may need to completely wipe your hard drive clean and restore from a Time Machine backup). It’s also possible that everything will go perfectly smoothly and you’ll wonder why you even needed a guide.

To install Vista on your Mac you will need the following:
- All firmware updates installed on your Mac (use Apple Button -> Software Update… to check)
- A Vista installation DVD (Home Basic, Home Premium, Business or Ultimate)
- Your OS X Leopard installation DVD
- At least 10GB of empty hard drive space on your Mac (you can probably get away with less but you’ll have almost no room to install anything other than the OS)
- An hour and a half if all goes well, up to 5 hours if not
- Though not absolutely required, it’s a VERY good idea to have a complete and up to date Time Machine backup of OS X – it really came in handy for me
- Patience, possibly a great deal of it. Having a book handy will also help kill time during the partitioning, installing etc).
Installing Vista via Boot Camp
- Here goes. First thing – close absolutely every open program you can. That includes those things running in the Apple Menu that you always forget about. Don’t worry about killing the Dock or Dashboard – having those running is fine.
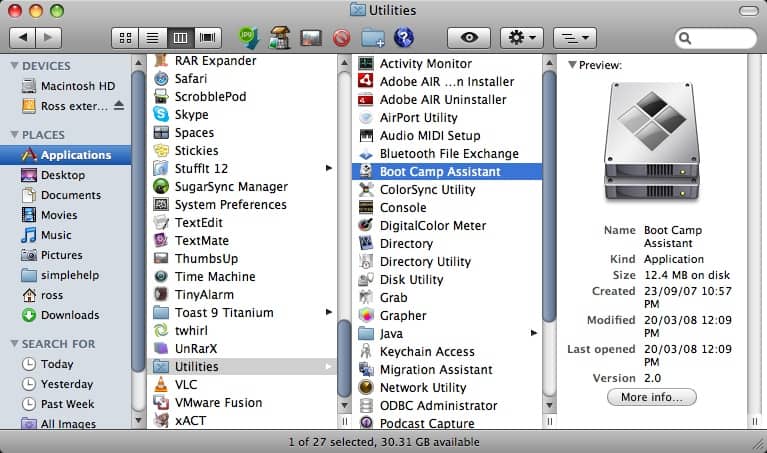
- Now open a Finder and navigate to Applications -> Utilities and double-click Boot Camp Assistant.
- It’s not a bad idea to have the Setup Guide handy, just in case you need it. Click the Print Installation & Setup Guide button.
- Click OK
- If you have another computer around, and would like to save half a tree (printing the guide will use 20-something pages) – select the PDF button and choose Save as PDF…. Alternately, you can download it here.
- If you don’t want to download my copy, enter the appropriate info (most importantly, the download location so you can find it) and click Save. Transfer the PDF to your other PC/Mac so you can access it while actually installing Vista.
- Back at the Introduction page of the Boot Camp Assistant, click Continue. Now you have to decide how much space you want to allocate to Windows Vista. You might be able to get away with going as low as 6GB, but I would highly advise against it. You’ll have almost no space left over to install software, and your page file in Windows might cause frequent crashes. I opted for 20GB, which left me with just a bit over 15GB to use after installing Windows Vista Ultimate and upgrading to SP1.
To change the amount of space to dedicate to Vista, click the small divider between Mac OS X and Windows, and drag it to the left.
- When you’re happy with the amount of space that Vista will have, click Partition.
- Watch the little status indicator..
- and hold your breath that no errors occur. If you’re presented with a Start Windows Installation screen, proceed with step #11 below (and consider yourself very lucky). If you get an error, keep reading.
The most common error is that OS X couldn’t move a file and the partition could not be created. There are a couple of things that could be wrong, and I’ll outline how to fix them from the fastest method to the longest method. Cross your fingers that the fastest one will resolve your problem.
Close out of the Boot Camp Assistant and launch the Disk Utility by selecting Applications -> Utilities -> Disk Utility.
Select your Mac drive, or the partition you were trying to install Boot Camp on (if you have more than one). Click the Verify Disk Permissions button, then the Repair Disk Permissions button. Once that’s done, click the Verify Disk button, then the Repair Disk button if it’s available.
Now go back to step #1 and try it all over again (except you don’t need to print out the PDF twice). If you were able to create the partition, excellent, continue with step #11. If you got the same “can’t move file” error, download and install OnyX. Once installed, launch it (you’ll probably be prompted for your password) and select the Maintenance tab. Click the Execute button and wait.
Once again, go back to step #1 and start all over again. If it worked this time, excellent, proceed to step #11. If it didn’t, you have another couple of choices. Neither is much fun. First, you can purchase defragging software (I’m not aware of any that are free/open source) such as iDefrag and hope that it resolves your problem (it might not). Second – and this is what I opted to do – re-install OS X by formatting the entire drive (all data will be lost), run software update to get all the firmware updates, install Vista via Boot Camp, and then restore OS X from a Time Machine backup. Like I said, not great choices. If you do decide to go the format and re-install route, I’ll outline it with a few more details –
- Know that you might lose all of your data. Time Machine could fail, your roommate might decide now would be a good time to smash your backup drive – any number of problems could occur. This is my way of saying that I will NOT be held responsible if this method causes you all kinds of nightmares. With all of that said, it worked perfectly fine for me.
- Make sure you have a 100% up to date Time Machine backup. Open Time Machine and select Back Up Now. If you opted not to back up certain folders, make sure you have the contents of those folders backed up – or remove them from the “don’t back these folders up” section of Time Machine.
- Put your OS X Leopard DVD in your DVD drive, and restart your Mac.
- Hold down the c key as your Mac restarts – this will force your Mac to boot from the DVD rather than the hard drive.
- Follow the walk-through to install OS X. Make sure you select the “format this drive then install OS X” option
- Once you’ve re-installed OS X, start your Mac and run the Software Update to make sure everything is up to date. Once completed, you’ll be prompted to reboot. Do so.
- Once again, run the Boot Camp Assistant. This time you should have no problems at all
- Carry on with step #11 below, and once you’ve completely finished installing Vista, perform a Time Machine restore. To do so, boot from the OS X DVD (hold down c as your Mac starts up) and from the Utilities menu, select Restore from Time Machine (or something like that, I forget right now). Let Time Machine do its thing (boring, takes forever) and once it’s done, reboot yet again. You’ll finally have a dual boot Mac w/ Vista and OS X.
- Alright, time to install Vista. Put your Vista DVD in your DVD drive and click Start Installation.
- A bunch of things will happen on their own. Don’t interfere with them. You’ll eventually land at a screen asking where you want to install Windows. Make sure, and I mean make sure you select the BOOTCAMP partition. Selecting anything else is going to force you to re-install OS X, and unless you have a recent Time Machine backup, you’ll lose all of your data.
Now click the Drive options (advanced) link/button. Click Format and once it’s done, click OK. Now you can click Next.
- Now Vista will install. It takes a while and it’s not particularly entertaining. Vista will restart itself at least once during the installation. If by some chance – and this shouldn’t happen – when Vista restarts itself, and you end up back in OS X instead of Vista, restart again and this time hold down the Option key as your Mac starts. You’ll be presented with a number of drive icons to choose from. Double-click the Windows icon.
And now Vista has finished installing, you’ve setup your “account” in Vista, and you think you’re done. You’re not. Eject you Vista DVD from your DVD drive (if you have problems ejecting it go to the Computer view in Vista, click once on your DVD drive, and then select the Eject link that will show up in the menu. Now pop in your OS X Leopard DVD. You’ll be prompted “Install or run program” – click the Run setup.exe button.
- You might be told that a system restart is pending and you can’t install anything yet. I never said this was a short process. Restart your Mac and make sure to boot into Vista.
- This time when you Run setup.exe you’ll get the “Welcome to the Boot Camp installer” screen. Click Next.
- Place a check in the “I agree” part, and click Next.
- Make sure Apple Software Update for Windows is selected, and click Install.
- Sit back and watch. Don’t interfere. Your screen may flicker, ignore it.
- Also ignore any pop-ups that might appear in your System tray.
- Almost done..
- And now you’re done. Click Finish.
- Restart yet again.
- Note: when Vista boots, you might encounter a couple screens full of error messages (Unrecognized partition table for for drive 80, can’t boot from NTLDR from drive=0x80 etc). Ignore them, and let Vista continue to boot. I have a (bad) camera phone picture of some of the errors below.
- This time when Vista starts, you’ll notice a new icon in the System tray – it’s the Boot Camp software. Click it once and a pop-up menu will appear. Select Boot Camp Control Panel….
- On the first tab, Startup Disk you can select which Operating System you want to boot into by default. Just high-light the one you want – but remember – you can also choose to boot to the other OS by holding down the Option key while your Mac starts. Note: you can also define which OS you want to boot into by default in your Mac. Just select the Startup Disk option in your System Preferences.
- Click the Brightness tab to adjust – you got it – the screen brightness.
- Click the Remote tab. From here you can disable or enable the use of a remote infrared receiver. Your choice.
- Select the Keyboard tab to make some keyboard changes. Boring.
- And finally, select the Power tab. Do you want to automatically restart after a power failure? Here’s where you decide. When you’re done reviewing all of the Boot Camp Control Panel options, click OK.
- And one last thing. Remember – no matter which Operating System, Vista or OS X, you decide to have as the one you automatically boot into when your Mac is turned on, you can select the other one by holding down the Option key as your Mac starts.