The “Manage Wireless Networks” options in Windows Vista and 7 are great at allowing you to organize your wireless networks. The problem is that navigating to it is a few too many clicks away. This tutorial will help you create a desktop shortcut icon that will directly launch the Manage Wireless Networks options.
Please note: unfortunately, this does not work in Windows 10. It’s for Windows Vista and Windows 7 only.
- Right click on your desktop and select New > Shortcut
- The Create shortcut dialog box will appear and will ask you to specify the location of the application you want to access. Enter:
explorer.exe shell:::{1fa9085f-25a2-489b-85d4-86326eedcd87}
in the location field and then click Next.
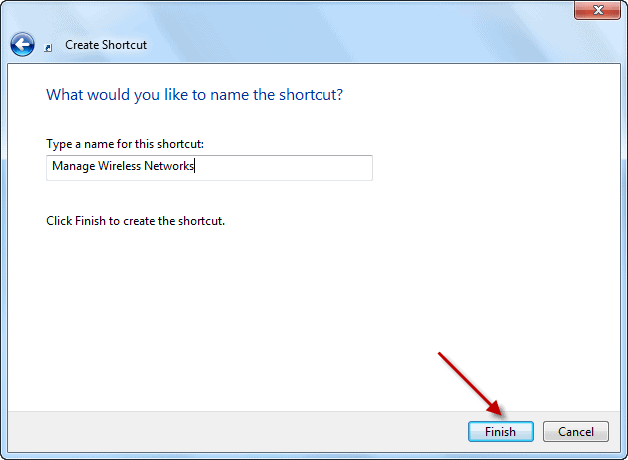
- It will ask you to name the shortcut. Enter something like Manage Wireless Networks then and then click the Finish button.
- At this point you’re done. You can skip down to step #7, or continue with the next couple of steps to use a custom icon for your newly created shortcut. To do so, right-click on the shortcut and select Properties.
- Go to the Shortcut tab and click on Change Icon.
- Select the icon that you want to use (if you have an icon file in mind). If you don’t, click Browse… and navigate to C:\Windows\explorer.exe. After you’ve selected explorer.exe, you’ll be presented with a series of icons you can choose from. Click OK.
- This will change the icon of the shortcut. Double click on the shortcut to confirm that it’s working.
- Now you have one-click access to accessing all of the Wireless Network options on your PC. Right-click on any one of them to move it up/down in the list of preferred networks, delete it etc.
- That’s it – you’re all done!