Similar to How to install Ubuntu in OS X using Parallels – a complete walkthrough, this tutorial will take you every single step of the way through installing Windows Vista using Parallels for OS X.
The steps and screenshots used for this tutorial are specific to an older version of  Parallels Desktop for Mac running on a MacBook Pro w/ OS X (10.4.8). With that said, they will be nearly identical if you have a Mac Pro, Mac Mini, MacBook or any other Intel based Apple Mac, and the process is similar in the newer versions of Parallels.
some additional info: As a friendly digger points out, you won’t be able to run Aero (the fancy graphics stuff in Vista) no matter how great your Mac video card is. VMWare is more likely to be the first allowing 3D in a virtual OS.
Setting Up Parallels for Vista
- If this is the first time you’re using Parallels, the Wizard will launch automatically. If it’s not the first time you’ve used Parallels, launch the Wizard by selecting Install OS
- Click Next after reviewing the first screen
- Select Custom OS installation and then click Next
- Select Windows as the Guest OS Type and Windows Vista as the Guest OS Version. Click Next to continue
- Here you’ll need to select the amount of RAM that will be dedicated to the guest operating system (Vista). I wouldn’t suggest trying to run Vista without allocating at least 512MB of RAM, ideally more. Because I have 2GB in my MacBook Pro, I’ve opted to dedicate half of it (1GB) to Vista. After you’ve selected an amount of memory click Next to continue.
- Select Create a new virtual hard disk and then click Next
- Now you’ll need to set the size of the “hard drive” that Vista will use. Because I don’t plan on installing a lot of software, I’ve left the default of 16,000MB (about 16GB). After Vista has finished installing, I’ll be left with about 13GB of free space – which is plenty to install things like Office, Firefox etc.
Review the differences between Expanding and Plain as a disk format. Parallels suggests using Expanding, and since I’ve only noticed a small difference in performance between the two, I would suggest it as well. Either way, don’t stress out over this decision too much – you can convert from one format to the other, using Parallels Image Tool, if you ever need to. Click Next when you’re ready to continue.
- Choose a location to store the hard disk image file (the default is fine). Click Next to continue.
- Click Yes to confirm.
- Select Bridged Ethernet and then click Next
- Now you’ll need to select (if you have more than one) which of the adapters will provide Vista with its network (Internet) connection. If you use AirPort to connect your Mac to the Internet, select it. If you use an Ethernet Adapter, select it. Both Wireless and Ethernet (cable) will work, just be sure to select the one you use to connect to the Internet. Don’t leave Default Adapter selected, but do leave Connect cable at startup checked (yes, even if you’re using Airport).
note: if you sometimes use Ethernet, but right now you’re using Airport, choose Airport. You can always switch the “Internet source” later.
- Give your Virtual Machine a name (it doesn’t matter what) and then click Next. Almost done.
- If you’re installing Vista from a DVD insert it now (if it isn’t already in your DVD drive), leave Start guest OS installation checked, and skip down to Installing Windows Vista.
If you’re installing Vista from an .iso file, remove the check from Start guest OS installation, click Finish and continue on with step 14.
- Back at your Parallels configuration screen for Vista, click on the CD/DVD-ROM entry in the Resources table.
- Make sure that Use image file is selected, and then click the … button to navigate to your Vista image (.iso). Click OK when you’re done.
- Back at your Parallels configuration screen, click the Save button to save your changes, and then click the green Power On button from the right sidebar.


- Choose Custom Windows Vista installation and click Next to begin.
- Click Finish (by the way, if you’re booting from an .iso don’t worry about the message re: putting the Vista DVD into your drive)
- Boring.
- Select your language, time and currency format and keyboard type. Don’t be at all surprised if you experience a weird “dual mouse cursors” issue (two cursors on the screen but only one actually works) – this will be fixed later by installing Parallels Tools.
- Click Install now
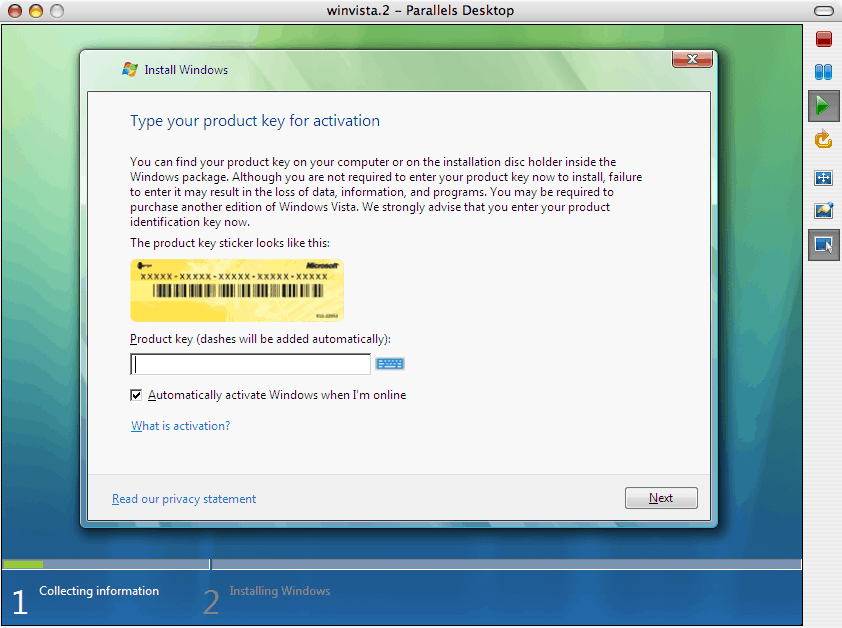
- Enter your Vista serial number. Or don’t – you can do this later.
- Accept the agreement and click Next
- You probably won’t have any choice – so select Custom
- Choose the Disk you’ll be installing Vista on and then click Next
- Go get a coffee.
- Eventually Vista restart itself. Just sit back and watch the fun.
- Still boring..
- Now’s a good time to go warm up that coffee..
- Almost done.
- Now choose a user name, password and picture/icon. Click Next when you’re done.
- Here you’ll choose a computer name. Sorry about the missing screenshot. Your computer name can be pretty much anything alpha-numeric and can include some ‘special’ characters (like dashes). Click next to continue.
- Now you’ll need to choose how you want Vista to handle updates. Review your options and make the choice that’s appropriate for you.
- Select your Time zone, make sure the Time and Date are correctly set, and then click Next.
- You’re welcome. Click Start.
- This step (Windows performance check) can take a few minutes.
- Finally, enter the password that you set a few minutes ago.
- Almost there…
- Ta-da! It’s Vista!
- There’s a pretty good chance that you won’t be connected to the Internet. If you check the Windows Vista Device Manager, you’ll probably notice that your Ethernet card isn’t installed correctly. Don’t worry about it – Parallels Tools will fix your Ethernet card, end the double-cursor problem and more.


- With Vista running (but not in full screen if you’ve been playing around a bit) use the ctrl-alt key combination to ‘escape’ from the virtual machine and return to OS X. From the Parallels menu, select VM and then Install Parallels Tools…
- Review and then click OK
- Back in Vista an AutoPlay window will appear. Click Run PTStart.exe
- Click Allow
- Wait, but don’t go too far –
- because you’ll have to choose Install this driver software anyway a number of times
- Again..
- and again.. and probably again
- Finally, restart Vista again by clicking Finish. When Vista boots back up again, you’ll notice that the mouse cursor is fixed (and you should be able to seamlessly move your cursor from Vista to OS X without having to do the ctrl-alt keyboard combo), your Ethernet card will be properly installed (which means you should be online), a new display driver will be installed allowing for more screen resolutions in Vista (though the fancy Aero parts of Vista won’t work, yet) and last but not least, you can share files between Vista and OS X.


