Please note: As of macOS version 10.11 (El Capitan), Disk Utility no longer comes with the option to repair disk permissions. macOS has implemented a different method to keep disk permissions set the way they should be. This guide is still completely accurate as long as you’re using a version of macOS that’s earlier than 10.11.
If you’re here because of a problem with your Mac and you’re using a version of macOS that’s newer than 10.11, you may want to check out the suggestions in this guide instead of trying to repair disk permissions.
If you find your Mac is running a bit more sluggish than usual, or a program you frequently use starts behaving oddly, you might need to repair your disk permissions. This tutorial will guide you in doing just that.
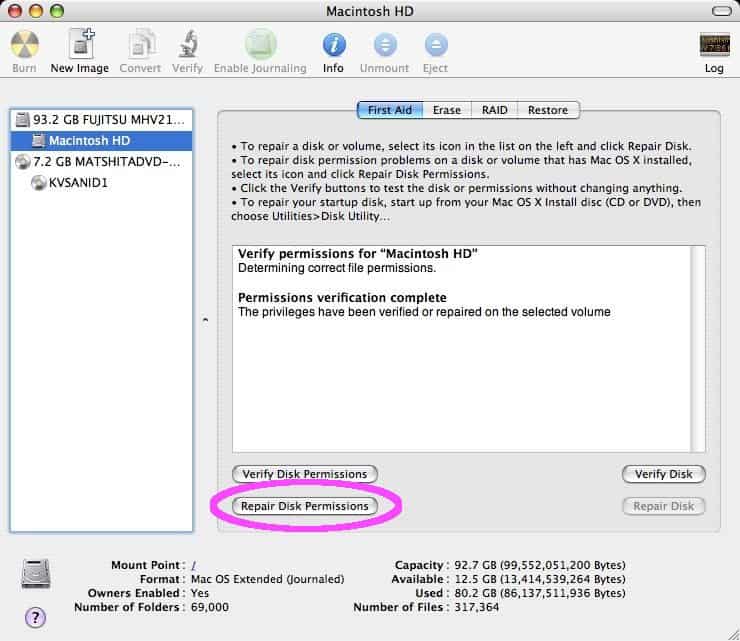
- Open the Disk Utility by selecting Applications -> Utilities -> and then Disk Utility.
- Select your primary hard drive (the one that you loaded OS X on) and then click the Verify Disk Permissions button.
- Disk Utility will check your drive for any permission errors. In the example screenshot below there are none (I run this program a couple of times a month) – but you may find a screen full of errors. If any errors do appear, click the Repair Disk Permissions button.
- When its finished, you can view everything that was detected and fixed by clicking the Log button in the upper right corner.