This tutorial will guide you every step of the way through installing Windows 7 on your Mac using Parallels Desktop.
Please note: This guide was initially published back in 2009 and Parallels Desktop for Mac has changed a lot since then. The functionality is the same, in fact it has only gotten better in the last 10+ years, but the steps and screenshots used in this guide have changed, probably significantly.
Parallels Desktop for Mac allows you to run other Operating Systems (like Windows 7) in a virtual environment, while OS X is running at the same time. Though Windows 7 won’t run as fast in Parallels Desktop as it does via Boot Camp, it is a very easy way to get Windows 7 running on your Mac.
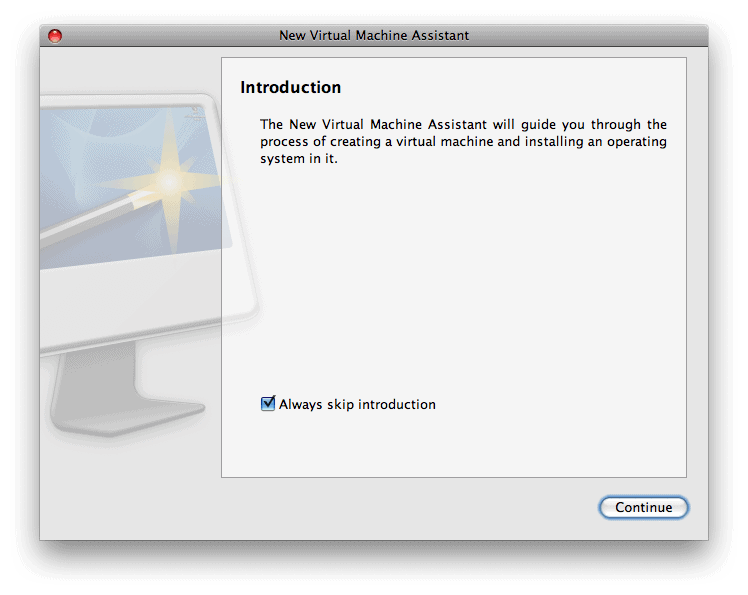
- If you’re using Parallels for the first time, an Introduction window will appear. Otherwise, click File -> New Virtual Machine…. Click Continue.
- On the Operating System Detection screen, select either the Real CD/DVD-ROM Drive option if you have Windows 7 burned to DVD (and make sure the disk is in your DVD drive). If you’re using an .iso image, select CD/DVD Image, click the Choose… button, navigate to your Windows 7 .iso file, select it and click OK. When you’re ready, click Continue.
- The automatic detection will probably fail. From the Type: drop-down, select Windows. From the Version: drop-down, select Windows 7 (experimental). Click Continue.
- From the Virtual Machine Type window, select Custom and then click Continue.
- Choosing the Number of CPUs: will depend on your Mac. I opted for 1, which is always a safe bet. You’ll want to allocate at least 1GB (1024MB) of RAM for your Virtual Machine, as Windows 7 will run quite slowly if you set it any lower. Click Continue.
- Select New image file on the Hard Disk Options screen, and once again click Continue.
- Specify a size for your virtual hard drive, and select Expanding disk (recommended). This will allow you to create a file that grows in size as you add files and programs to Windows 7, rather than creating the full “size” of your virtual hard drive immediately. Yet again, click Continue.
- Select Shared Networking (Recommended) as the Networking Type and click Continue.
- On the Optimization Options screen, select Virutal Machine (Recommended) if you want Windows 7 to have more resources while it’s running, or Mac if you want OS X to have more resources while Windows 7 is running. Click Continue.
- Finally, enter a name for your virtual machine (something ‘obvious’ like “Windows 7” would be ideal). If you want to enable File Sharing and User Profile Sharing, leave those boxes checked. Click the small arrow next to More Options and decide if you want to have a launch icon on your Desktop for Windows 7, and if you want to share your virtual machine with other users on your Mac. When you’re ready, click Create.
- Again, the same as in step #2, select Real CD/DVD-ROM Drive if you’ve burned Windows 7 to DVD (and make sure it’s in your DVD drive) or CD/DVD Image if you’re using an .iso or image file of Windows 7. Click Done to begin the installation.
- Windows 7 will begin loading files and start the installation.
- Select the appropriate language, time and keyboard layout for you. Click Next to continue installing Windows 7.
- Click the Install now button.
- Setup will initiate and take a moment or two to do its thing.
- When you’re presented with the Software License Terms, place a check in the I accept the license terms box, and click Next.
- Click the Custom (advanced) ‘button’ when asked which type of installation you want.
- You should only have one option on the Where do you want to install Windows? screen. If you have more than one, make sure to select the one that is the size you specified back in step #7 and has the idental number in the Free Space column. Again, click Next.
- Go grab yourself a cup of coffee. It’ll take a while for Windows to install itself. Windows 7 may reboot itself during this process.
- After the actual installation, you’ll need to setup Windows 7 itself. Enter a username and computer name in the spaces provided. Click Next.
- Set a password and password hint, and click Next.
- Enter the Product key that was provided with your copy of Windows 7, and unless you don’t want to activate Windows when you’re online, leave the box checked. Click Next.
- For now, click Use recommended settings. They can always be changed later.
- Make sure your time and date settings are correct, then click Next.
- The final part of the setup will prepare and create your desktop.
- And now, finally, Windows 7. But your work isn’t over quite yet. There’s a possibility that networking (including your Internet connection) and sound won’t be working – yet.
- Press the Ctrl+Alt keyboard combo to release your mouse and keyboard from Parallels (Windows 7). From the Parallels Desktop menu, select Virtual Machine and from the drop-down list, select Install Parallels Tools…
- You’ll be presented with a description window of Parallels Tools. Review it (if you want) and then click Continue.
- Back inside Windows 7, an AutoPlay window will appear. From it, click the Install Parallels Tools button.
- The Parallels Tools installer will launch. It will install each of the parts of Parallels Tools, and can take several minutes. You might refresh your coffee at this point. .
- Once Parallels Tools has installed, restart Windows 7.
- At this point you should have Internet connectivity. If you don’t have sound, make sure to run Windows Update, and it will detect any missing drivers (and find updates to the Operating System itself). Install all of the updates, and reboot again (if prompted). You should now have a fully working version of Windows 7 installed in Parallels on your Mac!