This brief tutorial will guide you in copying/moving pictures from your digital camera to your Ubuntu computer. The steps and screenshots are specific to Ubuntu 7.04 (Feisty Fawn) but will likely be similar to previous and upcoming versions.
Please note: This guide was originally published back in 2007. Quite obviously, a lot has changed since then (including Ubuntu itself). The steps and screenshots used in this guide have likely changed as well. This article is staying online as a historical/archived document, and should be treated as such.
- Plug your camera into the USB (or FireWire) port using the cable that came with your digital camera. Turn the camera on. The Camera Import tool will automatically launch – click the Import Photos button.
- The default location to save your photos will likely be the home folder. In all likelihood, you’ll want to change this. To do so, select the Destination: drop down list..
- And choose Other… from the menu.
- Use the Places shortcuts to navigate to the folder you want to save your pictures in. I have a My Pictures folder in my home folder that I use for just this occasion. When you’ve selected a folder to save your photos in, click the Open button.
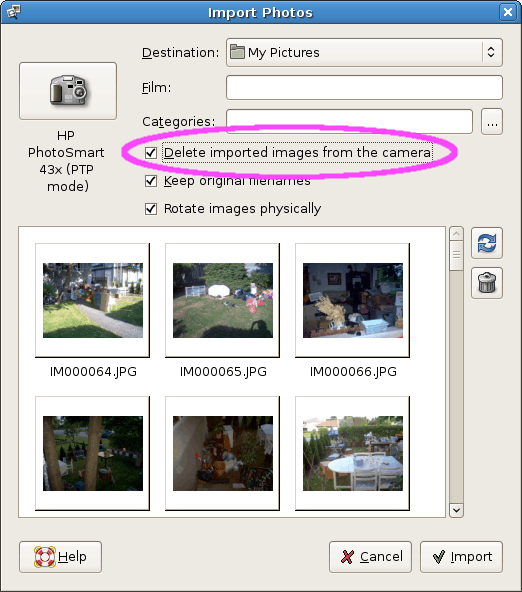
- If you want to delete the pictures from your camera after they’ve downloaded to your computer, make sure to place a check in the box labeled Delete imported images from the camera.
- Sit back and watch as the pictures are moved from your camera to your computer.
- Once the import has completed, the Ubuntu Picture Viewer will automatically open. You can use it to view all of the pictures you just moved from your camera to your PC, or just close it down.
- If you navigate to the folder where you store the pictures from your digital camera (again, in my case this is the My Pictures folder) – you’ll notice a new folder. That’s the one that contains all of the pictures you just moved from your camera to your computer.