This very brief tutorial will show you how to add tabs to Windows Explorer (now called “File Explorer”), so you won’t need to have a bunch of Windows open, cluttering up your Desktop.
You’re probably used to using tabs in your Web Browser, why not use them in Windows Explorer as well? To do just that follow these instructions:
- Head over to the Clover home page, and click the big Free Download button. Clover is a small file, very easy to install, and works in Windows 7, 8 and 10. Just double-click and follow the “Next” buttons.
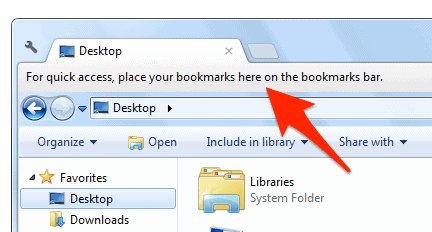
- If Windows Explorer doesn’t open on its own when the installation has finished, just open it as you normally would. Right away you’ll notice a difference at the top of the window. The first thing you’ll want to do is hide the “bookmarks” bar (you can always re-enable and explore this feature later). Right-click on the section of the bar with the text For quick access, place your bookmarks here on the bookmarks bar.
- Remove the check-mark from the box labelled Show bookmarks bar
- Now – click the small ‘box’ directly to the right of your currently open tab (see screenshot below).
- Ta-da! Multiple tabs! Keep clicking the same ‘box’ to create additional tabs.
- There will be a new shortcut to Clover. You can remove/unpin this and just launch Windows Explorer as you always have, and Clover will still be activated when you do.
- If you find Clover isn’t quite for you, check out QTTabBars as an alternative that offers very similar features.